Hi gang ![]()
I’ve been a little busy with Visual Paradigm this weekend and felt like sharing a few things which I think can be easily overlooked, but also very useful to know because they can actually come in handy!
Note that the tips aren’t shared in any specific order, using numbering is simply easier for me to keep track of the right amount ![]()
#10 The start screen isn’t just for show!
Many ‘environments’ use start screens these days but more than often it’s merely some kind of welcome screen which you’ll use once and then try to forget or remove, simply because there’s no point to it.
Visual Paradigm is ‘a little’ different though.
Let’s say you need to start working on an UML project, but if you click “New diagram” you then have to get through dozens of diagrams which you have no use for right now. Sure you can type a name and then select a diagram, but what if you want an overview to pick the diagram which best suits your needs?
Couldn’t be easier!
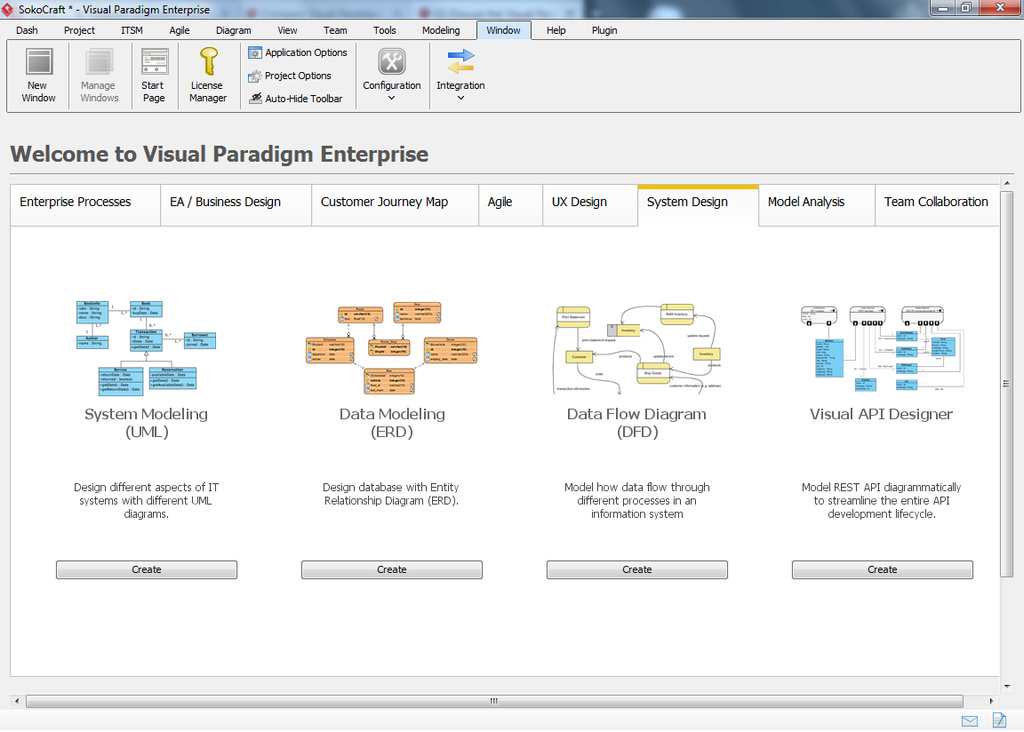
Just select the right section of the start screen. The trick is to click “Create” beneath the UML header, after that the only diagrams shown will be UML diagrams. And this works for other types as well such as BPMN.
#9 Quickly jump to elements and diagrams
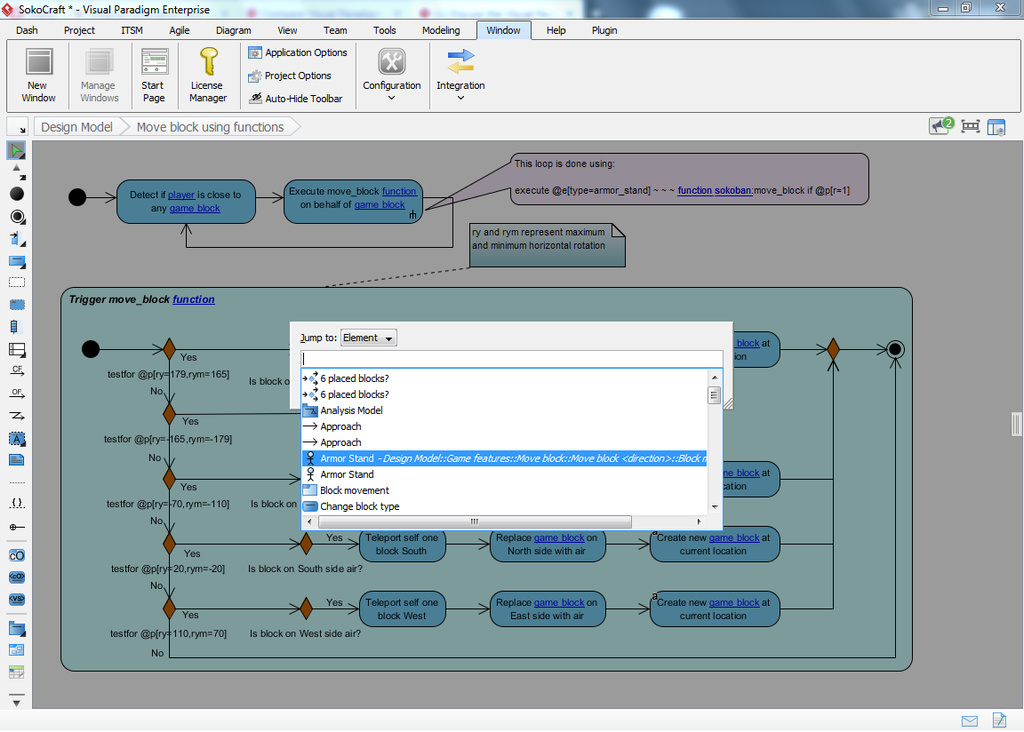
What if you need to check up on a model element in your project ASAP and you don’t want to bother with the project browser nor the diagram navigator pane?
Control-Shift-j (“Jump!”).
Type in the name, or just press cursor down to scroll through the drop down menu, and you’ll find your model element in no time. Do you need to find something in your current diagram? Then just use control-j.
And the best part: control-shift-D does the same but for diagrams; so instead of looking for model elements you’re now looking up diagrams. Easy.
#8 Set up (or change) key combinations
As you might know control-N opens the ‘New diagram’ dialog, control-shift-b takes you to the project browser, control-p opens the printer options and just pressing enter opens the specifications for the currently selected model element.
But did you know that you can fully customize this? For example: are you often creating new Use Case diagrams? Then why not assign the key combination control-shift-u to that (for example)?
How? That’s easy!
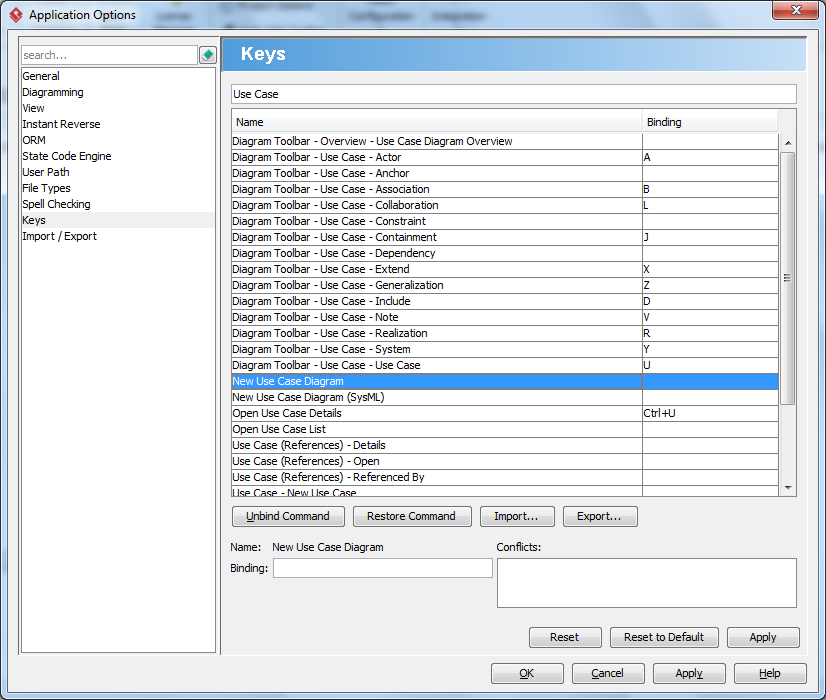
Open the Window tab and then click on ‘Applications options’, then select the ‘Keys’ section as shown above. From here it’s easy. If you need to find a specific option then just use the search bar, as shown above.
Click on the ‘Binding’ entry field and then press the key combination which you want to use. If the combination is already in use you’ll be told in the ‘Conflicts’ section. After you’re done you may need to restart Visual Paradigm and after that you’re fully settled.
Of course you can also use this option to learn about any existing keyboard shortcuts.
#7 Stencils and freehand tools are a thing
Microsoft Visio is well known for its stencil support which you can use to draw your own network diagrams. But Visual Paradigm can do that too!
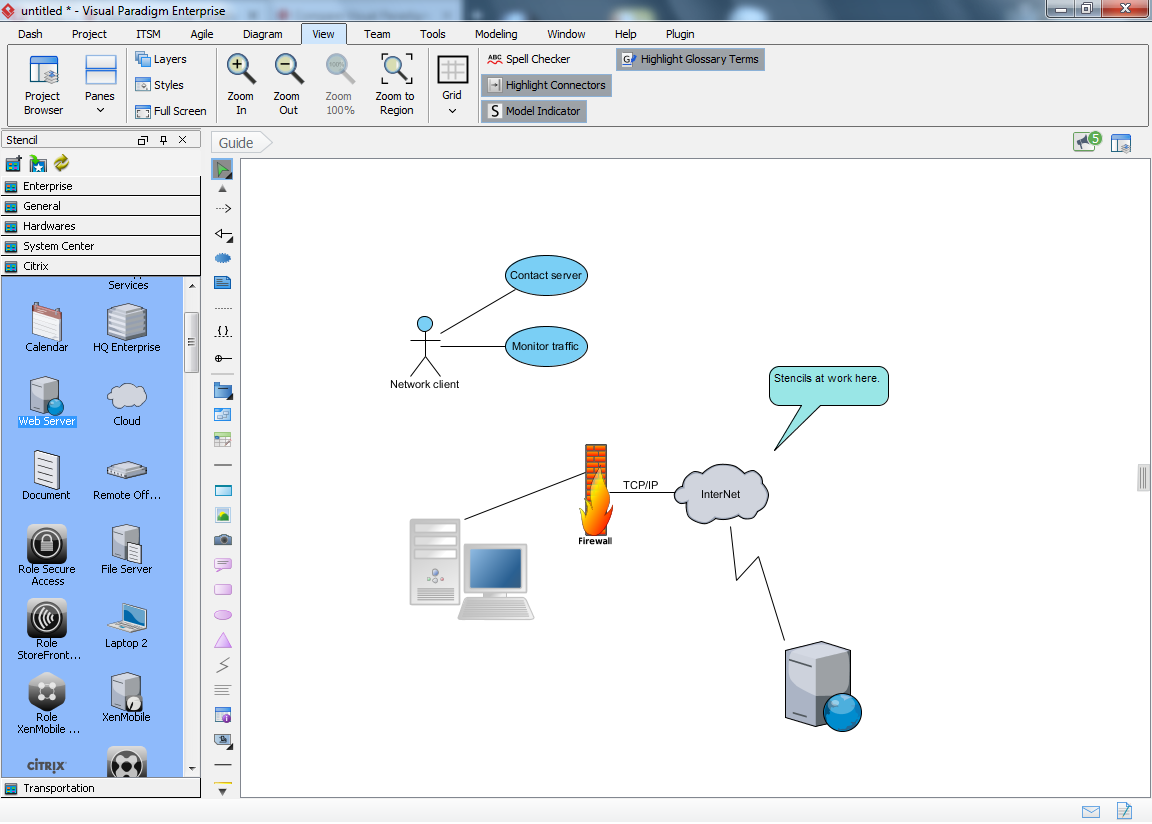
If you open the ‘View’ tab you’ll find the option ‘Panes’. Click on it, and then select the ‘Stencils’ pane to open it (as shown above). Now simply find the shape you want and drag it onto your diagram.
Keep in mind though that these shapes do not support the same kind of connectors as your regular model elements. So don’t expect to use the resource catalog, you’ll have to drag the right tools from your palette.
#6 Use layers to separate parts of your diagram
Although adding stencils to a diagram may make things more interesting to look at, it can also become a problem if you need to stay compliant with the official standards.
Fortunately this won’t be a problem for Visual Paradigm:
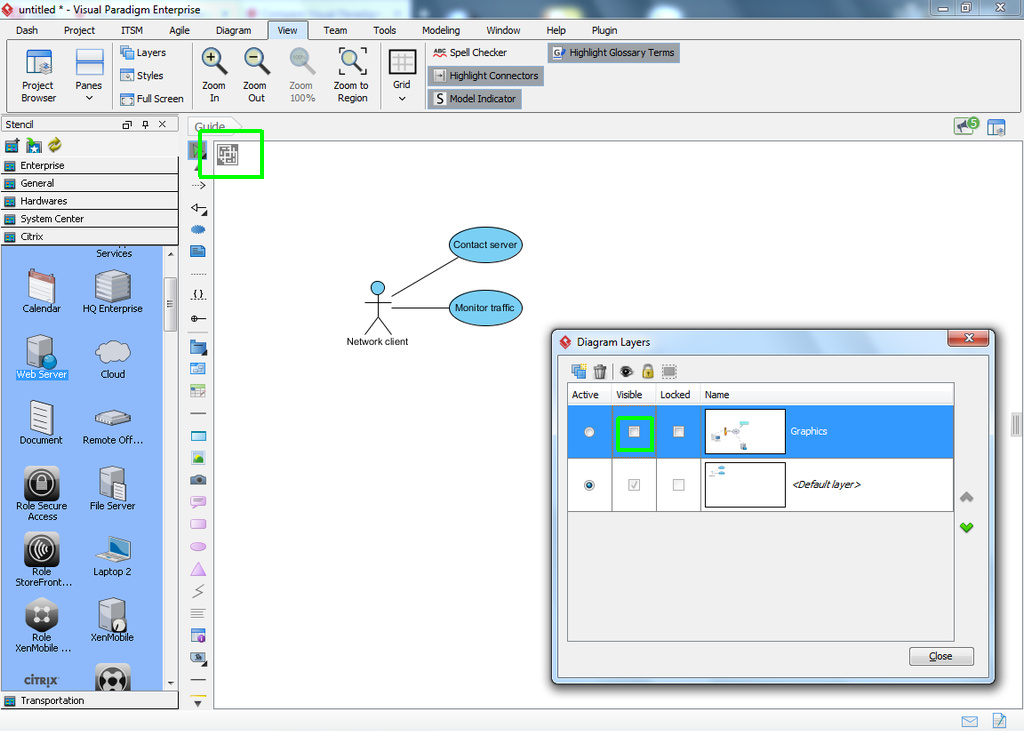
Just click on the ‘Layers’ option (also found on the View tab) and add a new layer, as I’ve done above. Then, with the new layer active, simply add all your drawings. Or, if you already had added those, simply select your drawings, right click to pull up the context menu and find the ‘Layers’ section. In there you can select the layer which should contain the selected items.
After you’ve done that you can simply remove the graphics by deselecting the ‘Visible’ option (as demonstrated above). Visual Paradigm can even warn you about the existence of hidden elements through the black indicator at the top left corner (note that this indicator will not become a part of your diagram, so you don’t have to worry about that).
#6 Use the ‘dash’ menu for all the options you most often use
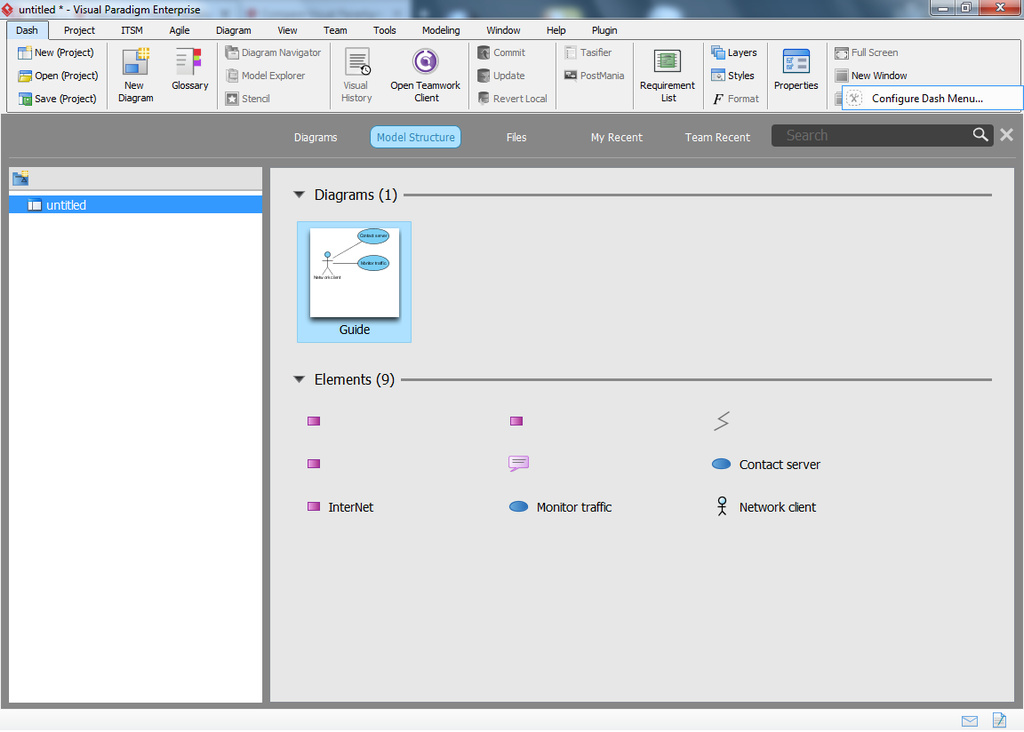
If there’s a menu option you often use then try right clicking on it and select ‘Add to Dash Menu’; it will then get copied to the first tab. If you need to customize your dash menu simply right click on an empty section and select ‘Configure Dash Menu’ (as shown above).
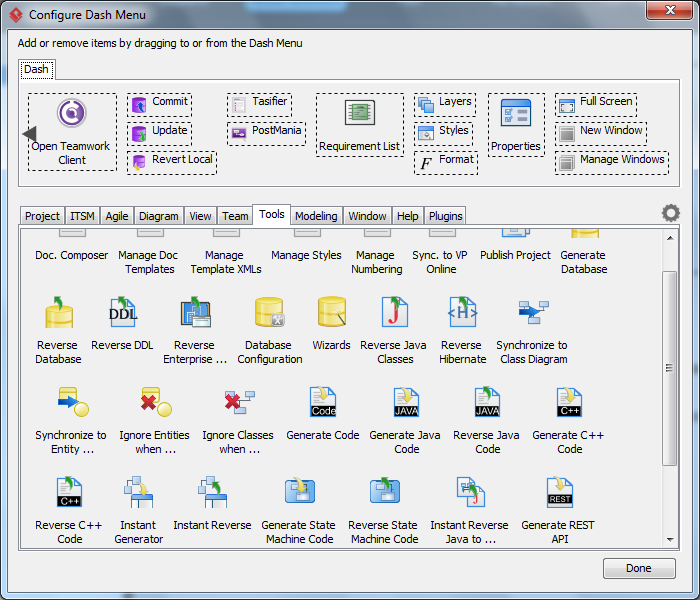
Then either drag an option which you want to add from the bottom to the dash menu itself. Or drag an already added option from the dash menu towards the bottom in order to remove it.
As you can see you can pretty much add everything you might need. Then you won’t have to continuously open different tabs but can simply pick every option you want from this one central location.
#5 Press alt once to show the tab selection keys
Do you need to open the ‘Modeling’ tab but you don’t want to use the mouse? No problem. Just press and release the alt key once and soon you’ll notice several letters appear:

Now simply press the key of the tab you wish to select and it’ll get opened. And don’t forget: if you wish to change any of these keys just use the method explained in #8.
#4 Use the Analysis option to check a model elements’ relationships
(note: available in the Standard Edition and up).
Model elements can be easily re-used in your current project by creating a new view. This can make it easier on you to manage the model element at a later stage; if you need to change any of its information then those changes would only need to be done once.
For example: let’s say you’re using an actor, which also represents an actual user. You added extra meta-information such as the department and the terminal which the user normally sits behind. But due to a reorganization the user is getting moved to another department. Not to worry: if you re-used the model element through means of a new view then you only need to change things once.
The only problem though: if your project consists of multiple diagrams then you might want to make sure that these changes don’t interfere with other model elements.
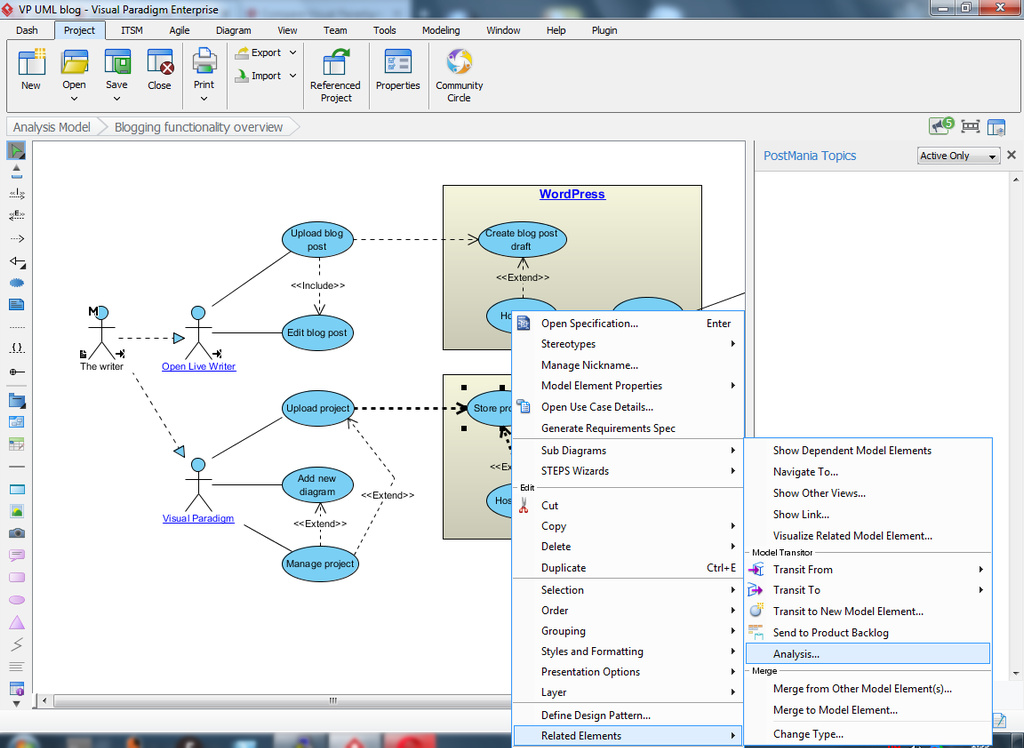
And that’s what the Analysis option is for:
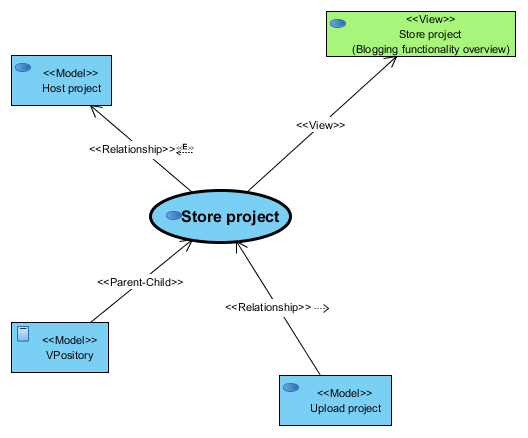
Every possible relationship will be shown here. And the best part is that the diagram is fully dynamic at first. You can simply make any required changes in your other diagram(s), then switch back to the analysis overview, click on the main element to select it (‘store project’ in this example) and then click on the green icon in the upper left corner. Click “Analyse all” and your diagram will be immediately updated with the new information.
Want to check what diagram contains a certain model element? Also easy: click on the model element (in the Analysis diagram), then click on the middle icon in the upper left corner (“select view”), you’ll be instantly taken to the diagram.
#3 Re-use model elements by creating new views
There are actually several ways to do this…
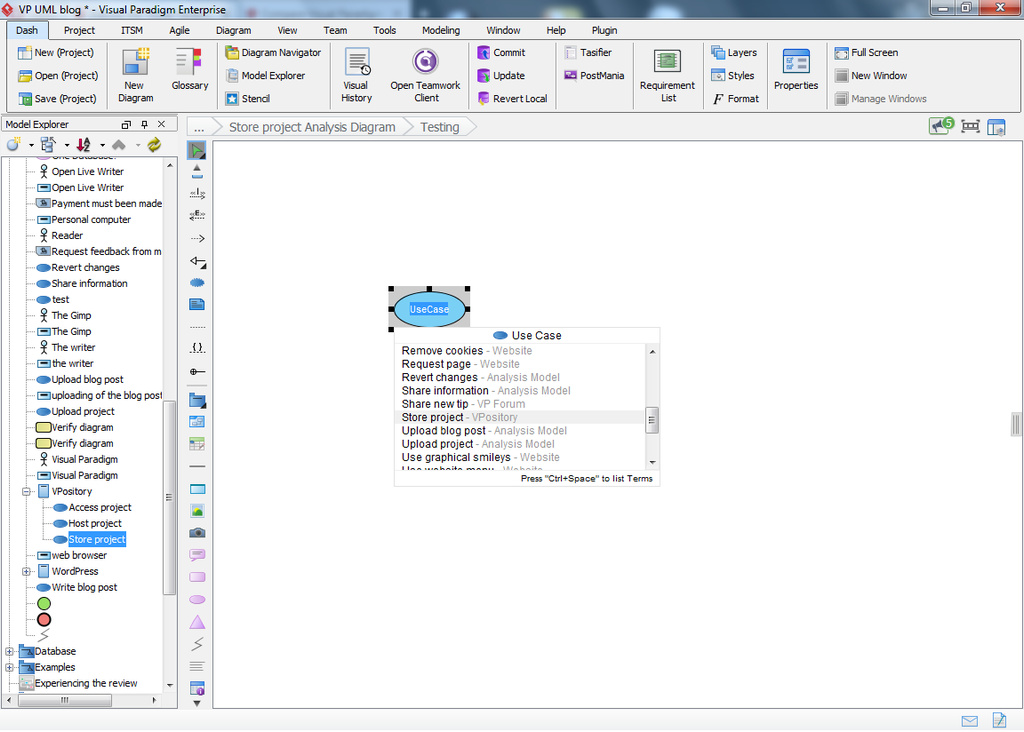
First: Press control-space after you’ve added a new model element, then select the existing name from now shown menu (as demonstrated above). This will re-create the model element, however it will show an ‘a’ in the upper left corner; that’s to indicate that you’re working with an ‘auxiliary view’. In other words: a copy of the original model element.
Second: You can also pull up the Model Explorer pane, and then simply drag and drop the element(s) which you wish to re-use from there.
Both options obviously have their (dis)advantages. For fast typists the first option can be very useful, but this option only shows you relevant model elements. So if you create a new Use Case then you’ll only be able to select from Use Cases. The second option can be easier for mouse usage, but it could be a little harder to find the model element you’re after (this heavily depends on the size of your project of course).
#2 Use the project browser to manage your project

Control–shift-b opens the project browser and this can seriously help you to keep your project(s) manageable.
Using models for example can be very useful if your project involves different stages, an example can be seen in the screenshot above. This is the documentation I keep for a hobby Minecraft project which also involves some heavy scripting.
I started with an analysis to check if what I wanted to do was actually possible, and I also set up a few drafts. Then I started working on an actual design, and all those diagrams found their way into the design model. This ensures that even if some of my diagrams end up with the same name then I will still know exactly what it is about.
Visual Paradigm can suggest some default names which you can use such as the ‘Analysis Model’, ‘Design Model’ and ‘Implementation Model’ but of course you’re also fully free to use whatever you want.
Because this project was created using the current version of Minecraft and because the upcoming version is going to severely change the internal command set we’re also preparing for a full conversion process: to “translate” all our code from Minecraft version 1.12.2 to 1.13. As such I also started using the ‘Conversion model’ model ![]()
Of course it’s also perfectly doable to manage this from other areas (the Diagram Navigator pane comes to mind for example), but that’s the beauty of Visual Paradigm: those choices are entirely left up to you.
#1 Use the Community Circle if you need help getting started
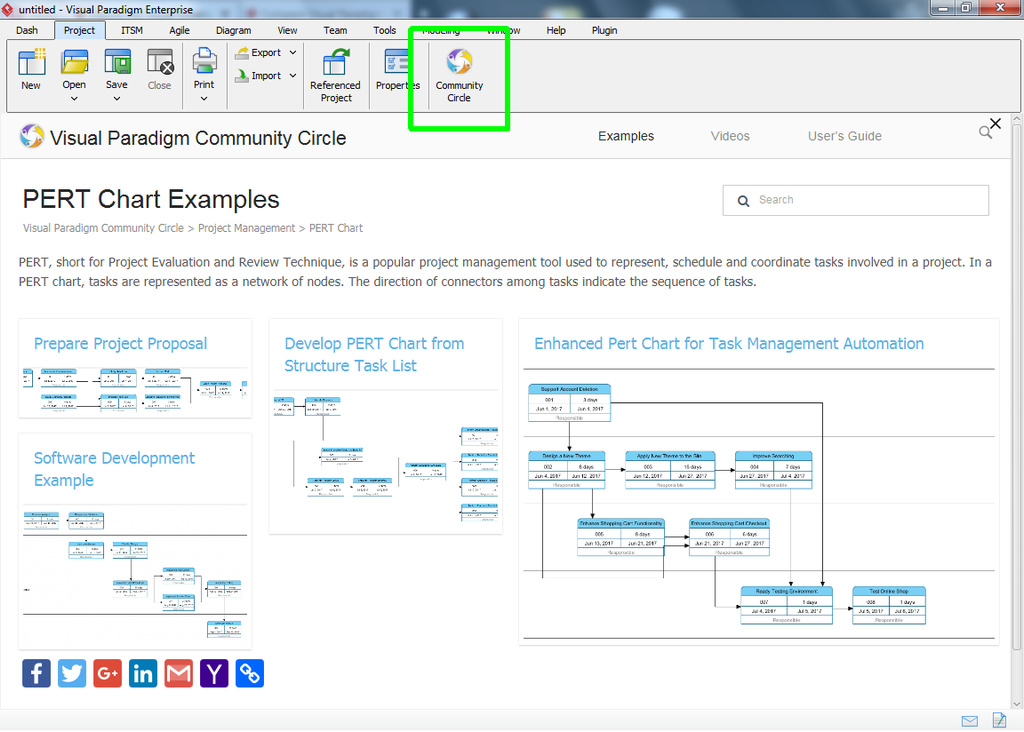
Sometimes you create a new diagram, double click to open the resource catalog but you just don’t know where you should start… If that ever happens to you then consider using the Community Circle option, as shown above.
The Community Circle contains dozens of examples for pretty much every diagram type supported by Visual Paradigm. And the best part is that this is a community effort, so you could easily come across diagrams which were shared to showcase real examples.
And there you have it…
Ten tips which I hope can be of some use to you ![]()