Hi guys,
Editorial
First off: I realize that I may be addressing a topic here which could be well known amongst most of you readers. Even so, my goal is to keep my posts a little diverse, and in my opinion there’s nothing wrong with addressing a topic which might be more aimed towards new(er) users from time to time…
Different projects, different designs
Design projects can come in many shapes, no pun intended. Sometimes you can come across a situation which is really simple: all you need is one Use Case diagram, optionally supported by an Activity and maybe a Sequence diagram and you’ll be fully set.
But at other times you may be looking at something much bigger. Maybe a team effort where you will need to keep taps on several stages of the project because management expects you to keep them informed all the time. From analysis and (pre)design right down to the actual implementation.
In the recent weeks I even learned that some people pick their CASE tool specifically based on those needs. So; for something simple you’d use “A” whereas a large team based project requires “B”.
But what if I told you that Visual Paradigm can do all of the above? And more?
#1 : Keep it simple, use the start page
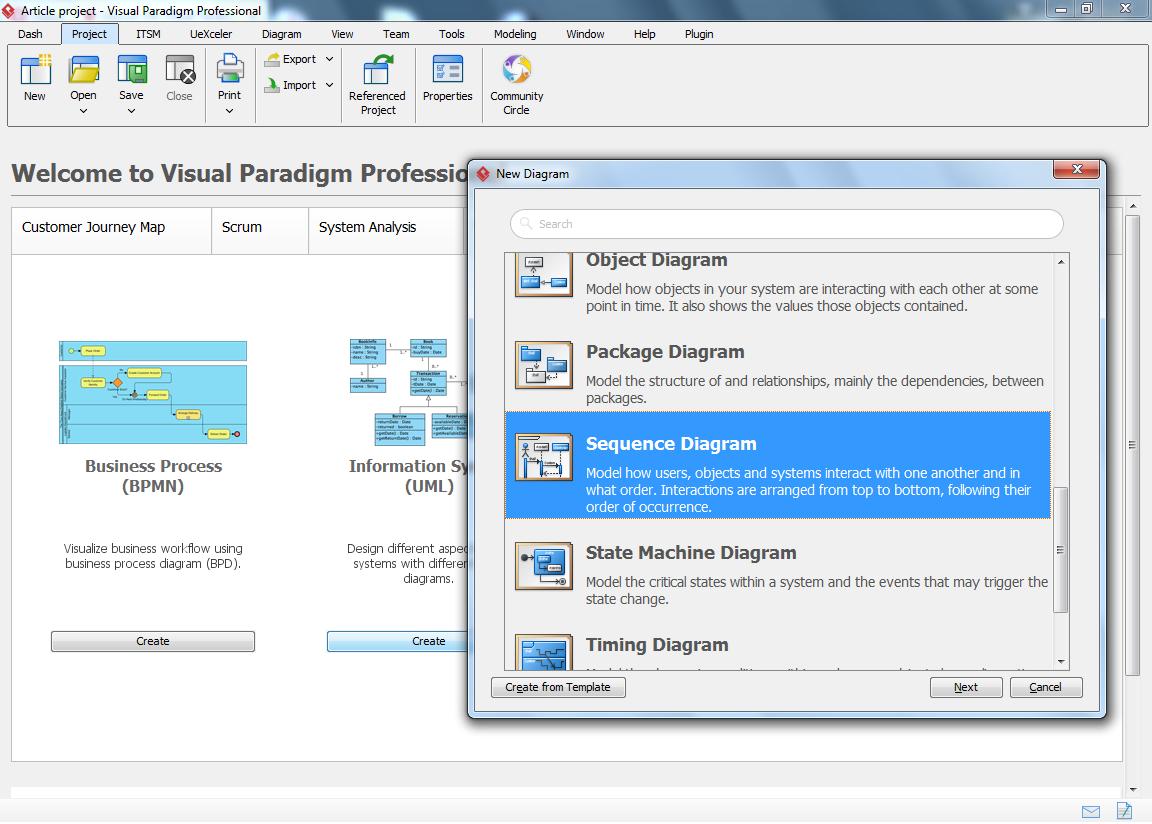
The start screen isn’t just eye candy nor was it designed to lure you into other (higher) licenses. Instead it can be the ideal place to help you get your project started. In my example I wanted to focus on UML diagrams, I already mentioned the Use Case, Sequence and Activity earlier on.
So what makes this approach a lot easier on you is the fact that the options in the start screen will filter your available diagram types. So by clicking on ‘Create’ in the UML section you’ll ensure that the only diagrams you get to see are UML diagrams. And that can make it a whole lot easier if you’re searching for a specific type but can’t easily recall its name from mind.
#2: Use the Community Circle for examples & templates
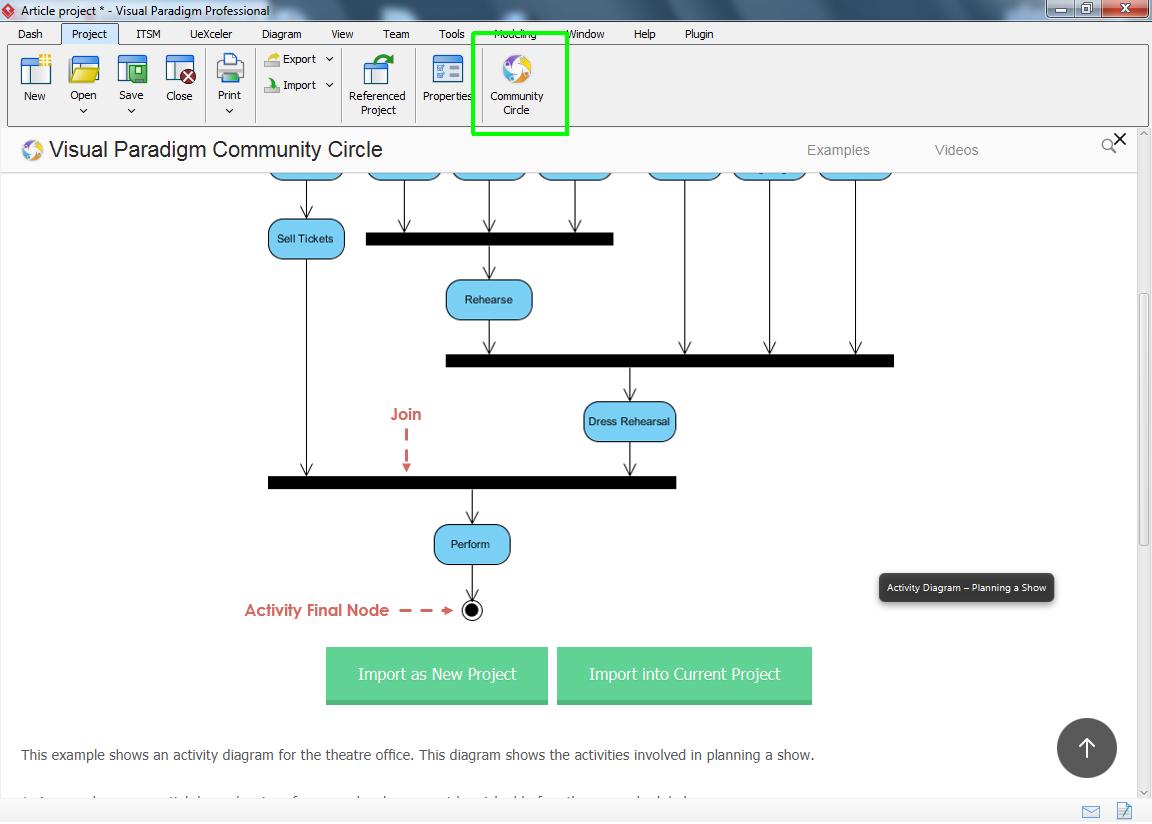
Sometimes things may turn out not to be as easy as they first seemed, and then it can happen that you could really use a little nudge in the right direction. Well, that’s what the community circle is for: a continuously expanding collection of examples for you to use in your own projects. And adding an example to your own project will only take one click of the mouse button.
And the best part? Most of these examples were added by us, the Visual Paradigm community, and I think that can really make a difference because generally speaking users often know what other users might need.
#3: Use the Diagram toolbar to add diagrams

Should be pretty self explaining… Just click on “New”, select the right diagram type and you’ll be well on your way.
However, this also brings me to a small side-step, because… Creating your diagrams is one thing, what about keeping track of them?
Keep track of your diagram(s), quick side-step
There are several options which you could use, and you can make it as easy or complex as you want… The first option is to use the project browser, you can either press control-shift-b or click the icon when working on a diagram. Its on the upper right corner right below the toolbar:
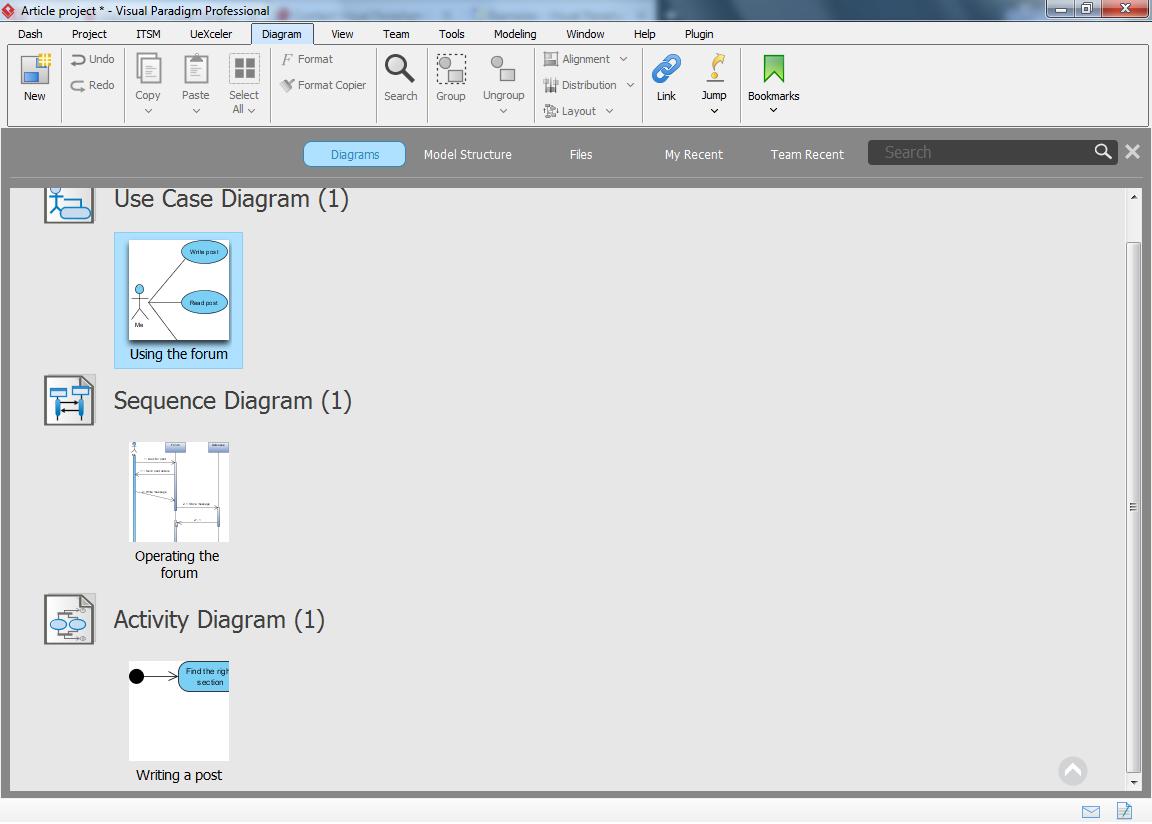
(project browser)
As you can see this is really pretty straight forward: you only get to see the diagrams you’re working on, and nothing more. No distractions, no complex virtual folders, just your diagrams and that’s it. Need to create the next diagram? No problem: the ‘New’ option sits ready, right in the Diagrams toolbar.
Another option is to use the Diagram Navigator instead of the project browser:
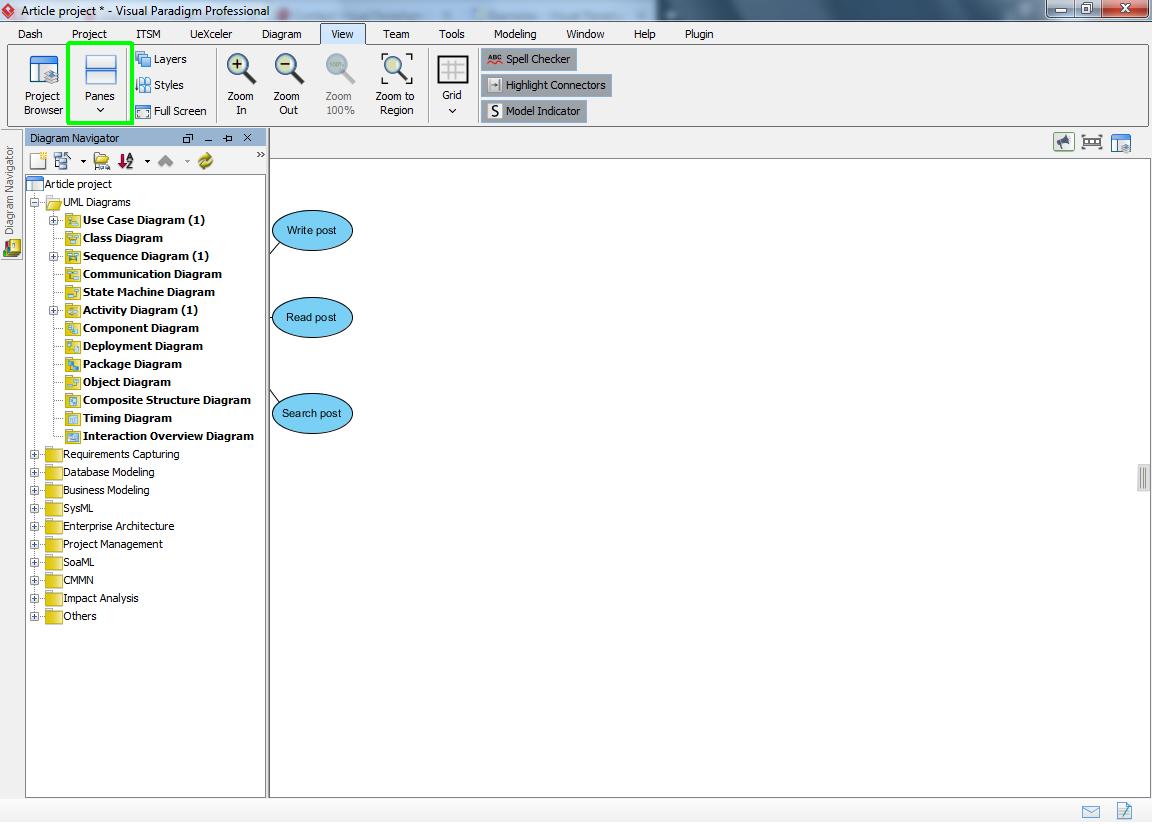
While working on a diagram just open the Panes option, to be found on the View toolbar, and then click Diagram Navigator. The result can be seen above. Not only does this give you a direct overview of all your diagrams, it’s also extremely easy to add a new one: just right click on a folder, and you can start working on that diagram type right away.
And all this without ever having to move away from your current diagram.
But what if you’re working on a rather complex project? Like the example I mentioned earlier where you’d have to keep track of several project stages?
Well, that brings me to my last option:
#4: Start by setting up a (model) structure
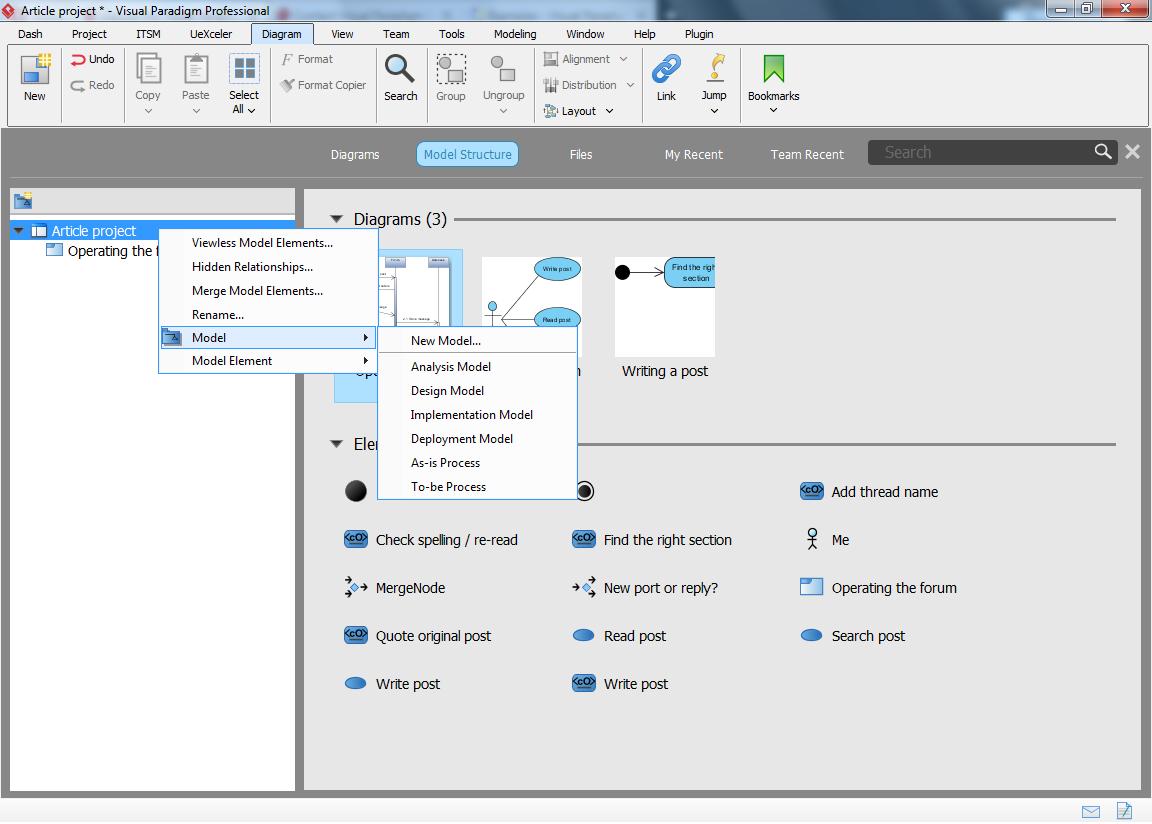
The project browser can display your project in more than one way. The model structure view, shown above, allows you to organize your project by using models. A model, as shown above, is basically a virtual folder in which you can store diagrams and all their associated model elements. This can help you to keep things organized and nicely sorted. For example: I could create a model called “Analysis model” and then use it to store only those diagrams which were used for analysis purposes.
Of course you don’t have to use any of the predetermined names if you don’t want to, you’re fully free to use your own model names.
Once you created a new model then it’s very easy to add new diagrams to it. First click on the model to select it. If you didn’t add any diagrams yet then simply click on the large ‘plus’ icon which is now showing. This is basically the ‘Add diagram’ option which has been copied to a more convenient place, so that it’ll be easier on you to add something new.
Another way is to use the ‘New’ option from the Diagram toolbar. This will work exactly as before, but with the main difference that it will now also show you the name of your currently selected model as a “location” (= the model). You’ll find it right below the entry for the diagram name.
And finally you can also right click on the model name, find the “Sub-diagram” option in the menu and from there click “New diagram”.
Structuring an existing project
Finally… If you’ve been using the first 3 options to start your project then you may have ended up with all your diagrams (and their model elements) sitting right in the root location of your project.
Although having everything in one location isn’t much of a problem it could become tricky if you’re working with several diagrams of the same type and somehow need to keep them separated. For example: having 2 Use Case diagrams which both explain how something should work, but with the main difference that one diagram describes a beta design whereas the other was made after a finished product.
Fortunately you can always sort your project at any time you want. So you could easily start your project small and when it slowly gets bigger then you apply some structure to it.
It’s really very simple: once you made a model in which you want to place an existing diagram then simply drag and drop it right from within the project browser. Drag a diagram from the right side of the screen (so: from the diagram overview) and just drop it onto one of the (new) models.
This will move both the diagram as well as all of its associated model elements to the new location.
So even if you started your project without any structure then it doesn’t have to stop you from expanding on your project by adding a bit of extra structure at a later time.
And there you have it…
This is one of those many reasons why I’m such a fan of Visual Paradigm. Unlike many other products on the market VP doesn’t try to force you into using a specific workflow. Instead you can use VP any way you want to, and it will simply adapt to that way of working.
(edit)
Whoops, didn’t realize that editing this message (to change the category) would also bump it, so I’ll be a little careful with editing the rest. All in due time ![]()